Blade coating removal?

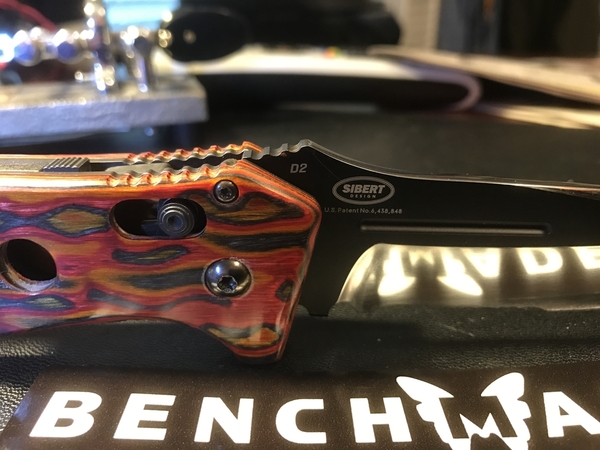
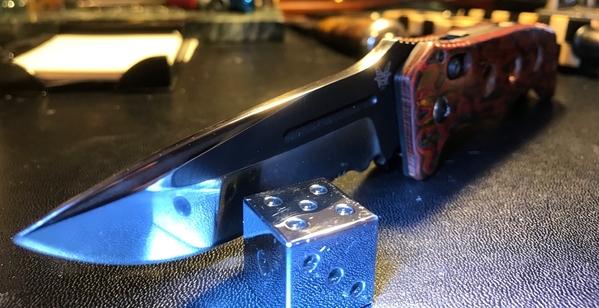
I'm looking to remove the coating on a knife similar to the one below. I'm trying to figure out the best way to remove the coating on the swedge and bevel but leave the flat coated. I'm currently thinking a guided sharpening system would be cleanest but not sure if I'll be able to get the angles to match up. Any suggestions would be helpful. Thanks in advance.
-

I've been wanting to do the same thing to a few of my more trashed coated blades and you got me thinking here. I would try using a wax protector on the areas that you want to keep the coating. Same stuff they use to protect steel blades and the like when acid etching. Then I would try soaking the entire blade in one of the better paint removers. Doing it this way should leave the coated areas exactly the way they looked prior to coating.
Thoughts here guys?
0 -

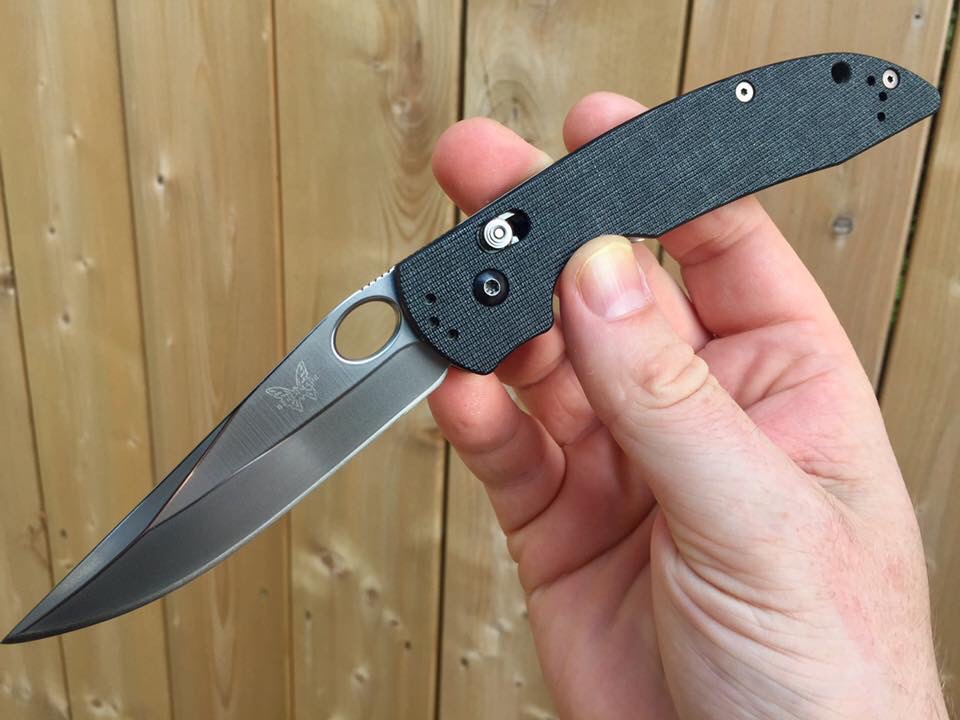
Keyman removed the coating on my 2750 Adamas.
He used Gaffer's tape to protect what he didn’t want to remove.
You have to be REAL careful that it doesn’t lift and expose what you want to keep.
I think the new Gorilla tape is even more tacky, thus better to prevent lifting.
Not sure HOW he removed the BK. So ask him.
He polished it and then I polished it even more once I got it back.
Pretty sure SRE did the same thing.
Attachments
 1
1 -
 1
1 -
The polishing will remove your edge
0 -
Cool. Thanks Tim and BM. Looks like keyman did an awesome job protecting the seams. The knife in question is pretty chewed up but miraculously has the factory edge (dinged up albeit) and the flats are clean.
1 -
Please let us know how it comes out!
0 -

Wow, that looks very good. I like it.
1 -
Dang BM your 2750 Adamas looks awesome!
I think I might move forward and test it out on a cheaper BMK and do up my 2750 like that once I have it down. It's a totally unique look.
What scales are you using on it?
0 -
Tim O posted:
Please let us know how it comes out!
Will do! Haven't even received the knife yet but I'll make sure to photograph the progress. I've had someone offer to bead blast and polish the blade but I definitely want to keep the logo and steel type visible.
0 -

My two cents:
Just polish, polish, polish...
You can still keep the laser markings visible by doing so... Media blasting can be iffy if you’re not in total control (which you would be if you simply polish by hand). If you’re dead set on leaving the flats coated, I’d opt to tape off your lines, personally. Yep, I’d most likely use Gorilla tape too.
Remember this 806D2? I was just thinking about trying to reacquire it... So sexy...
 0
0 -
"Just polish, polish, polish..."
I agree.
Sand, sand, sand maybe more of what you will be doing.
And then polish, polish, polish!!
0 -
Tim O posted:.
What scales are you using on it?
Keyman
0 -
martymcfly posted:
My two cents:
Just polish, polish, polish...
You can still keep the laser markings visible by doing so... Media blasting can be iffy if you’re not in total control (which you would be if you simply polish by hand). If you’re dead set on leaving the flats coated, I’d opt to tape off your lines, personally. Yep, I’d most likely use Gorilla tape too.
Remember this 806D2? I was just thinking about trying to reacquire it... So sexy...
I do remember that one. Was that Sean's at one point? That's exactly what I'm looking to do with the M2 blade I recently picked up.


 1
1 -
Ah, an 804HS! Sweet!

Not Sean’s... My old bare 806D2 was purchased from another gentlemen who had stripped the coating. All his work. Just few nights ago, I actually found a pic of that very same knife online. In doing so, I was able to track down the original owner. I can attempt to inquire about his process... I’ve heard about quite a few different ways to go about such a project.
Remember though, you’ll need some elbow grease no matter how you go about it. I’m sure you’ve learned by now that coated blades hide a finish underneath that is anything but smooth (to ensure proper adherence of the coating).
1 -
I’d probably try giving it an acetone bath to remove most of the coating... Clean it up (plastic scraper, then rinse) and then go at it with a wire brush or scouring pad. Grab some 400 grit sand paper and work your way up... A labour of love.
I love watching other people’s results. Can’t wait to see how you make out.
1 -

/|\ send that blade to Mac, he has lots of time to kill sitting out in his tree house.😀
0 -
billhammer posted:
/|\ send that blade to Mac, he has lots of time to kill sitting out in his tree house.😀
I'm not opposed to having someone do some of the heavy lifting for me especially if they've had good results in the past. Conversely, this job is probably the last thing Mac needs in his life. 😁 I should be able to accomplish what I'm looking for and if not it's $100 down the drain. I can live with that.
0 -
So I picked up a beater 275BK that has most of the coating worn off from what I can tell. I'm going to use it as a learning tool to see what works. I'll probably have to do quite a it of sanding and polishing (W,R,R) and might do some black oxide work to the flats.
If it comes out decent I'll have to see what Keyman has available and spiffy up the scales! (Thanks for the tip on those scales BM!)
0 -
 Tim O posted:
So I picked up a beater 275BK that has most of the coating worn off from what I can tell. I'm going to use it as a learning tool to see what works. I'll probably have to do quite a it of sanding and polishing (W,R,R) and might do some black oxide work to the flats.
If it comes out decent I'll have to see what Keyman has available and spiffy up the scales! (Thanks for the tip on those scales BM!)
I asked about this at the Benchmade store & acetone was there best suggestion, just as marty has suggested. I have a few that i am thinking of modifying also, just haven't worked every detail yet
0 -

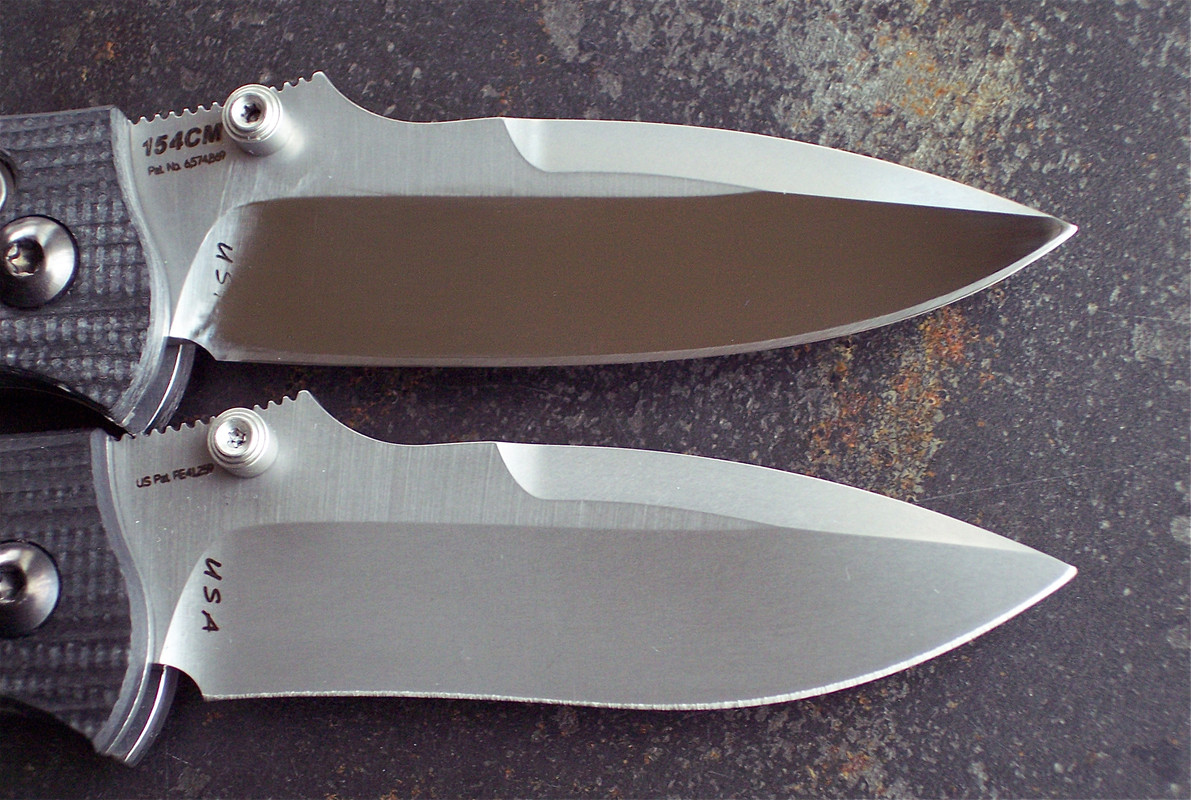
Removing the coating is almost irrelevant when handsanding a black blade face-- 99% of the effort is spent removing the original grind lines, you need to get below them to create a perfectly flat surface. But that is a bit misleading-- you'll end up w/ a Perfect Plane, but that plane both curves and rotates as you reach the sweep, approaching the tip. But the plane is large enuf that as long as you trust your "feel" you'll end up w/ this (what looks like peeling coating around the hole is just water, 550BK in S30V):

This shot was taken at the 600-grit level, clearly showing both the stroke I use and also the 600-grit "dazzle" that I love. You can continue further and maintain that dazzle-- progressively muted-- up to 1500. Beyond that, you start approaching more of a polished look-- I find 2000 tho useful only as a step up to 2500, which is a pretty decent near-polish. 3000 is more difficult to work w/, but that's where I take blades where a polish is desired. I took this blade to 3000, and it currently resides in the CF handle of a Gold Class Grip. I work at about a million miles an hour as I've done so much of this but until you reach that level of confidence you need to work very carefully, as a single errant stroke can do irreparable damage. I start at 320-- 220 is a bit quicker of course for coarse work but it's EZ to go too far too fast. As you can see, careful sanding allows the retention of crisp intersections, anything short of that looks just plain sloppy.
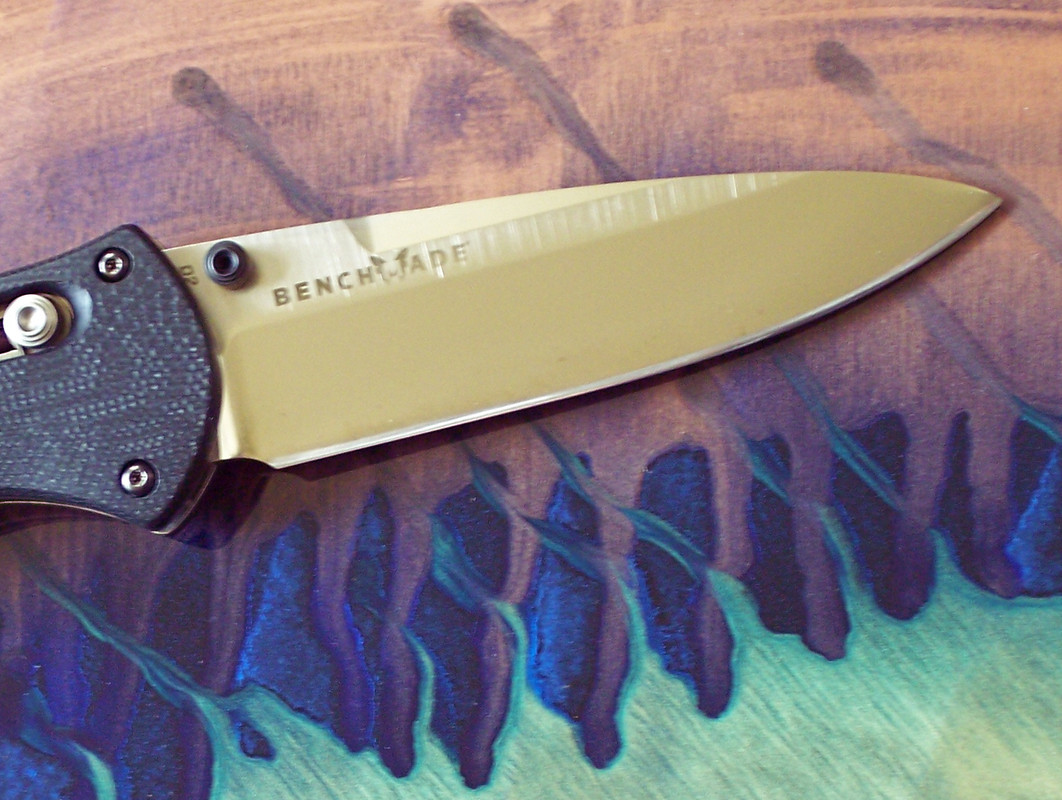
Next is a variation on my favorite small knife, a 525BK-1101 in M4-- in a pinch, you could skin an elephant w/ this knife (I have 3 variants in my knife drawer). This one also shows the sanded remnants of an etching, kind of a "ghost" etching, kinda cool. Swedges are difficult-- you've got the same progressive curvature/rotation of the plane, 'cept the plane is the width of a toothpick. Needs to be done solely on feel-- feeling/following the rotation-- you could close your eyes, you might as well as you can't see what you're doing anyway. Takes a little practice to keep things crisp:
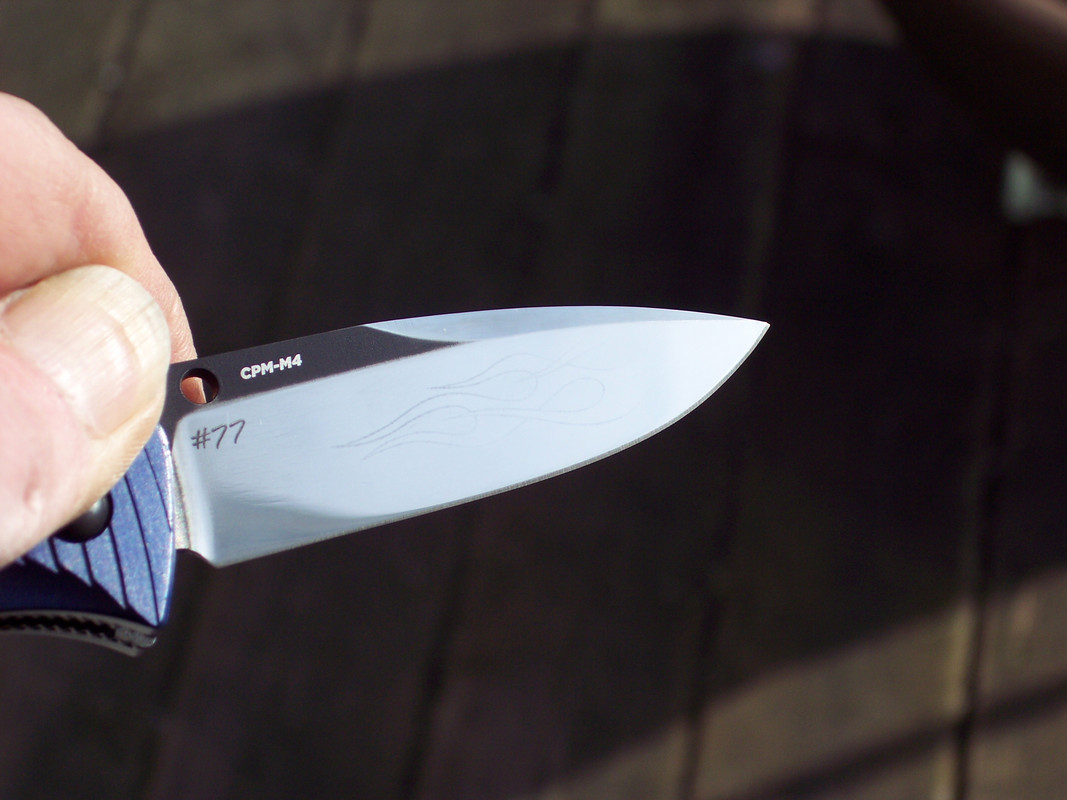
Too much contrast w/ the unsanded black blade flat tho for my tastes, so I softened the look a bit. You can really see the grind lines here on the flat, the blade face would look like this as well if left at this early stage (still a LONG ways to go to get below the grind lines):

You can do a lot more than simply remove blade coatings w/ handsanding (I call it "flatsanding", I sand on glass). Don't like recurves so I reconfigured the geometry of an HK 14210, here shown above an unaltered blade:
You need to apply EXTREME continuous differential pressure toward the cutting edge as you sand on a project like this (also on the following ones), otherwise the grind shoulder will simply rise right along w/ the disappearing recurve. It would look pretty lame.
My first project was a Warn 583-1 tanto-- no longer a tanto-- in D2. Thick blade, this thing is a beast (assist removed as well). I've worked a total of 9 different steels that I can recollect (mostly BM folders but throw in a few non-BM fixed-blades) and D2 is by far my favorite. There must be an extreme rigidity in the atomic structure of D2-- the stuff "sings" when you work it. Hard to explain, but you can hear it, just as you can feel the music thru your fingers. My shoulder intersection here is a bit slopped out (okay, MORE than a bit haha) as I tried to take this one from 3000 to a Flitz polish. It's a story that could be a thread in itself but long story short, the HUGE carbides in this extremely coarse-grained steel cause insane polishing complications, especially when you press hard to speed up the process. But slop or no slop, this knife remains one of my absolute favorites:
Another tanto conversion, this was a 523 tanto:
That's all for now, hope this was helpful for some of you-- R.
2 -
ryxlyx posted:
Removing the coating is almost irrelevant when handsanding a black blade face-- 99% of the effort is spent removing the original grind lines, you need to get below them to create a perfectly flat surface.... .....That's all for now, hope this is helpful for some of you-- R.
Ryxlyx,
Not sure if it's just me... But none of the photos in your post came through. "Image Not Found" is all I see for each photo and I'm interested in seeing how your work came out. Can you check the post?
0 -
Same here Image Not Found
0 -
Dang. The pictures all show when I pull it up, I just used the prompts on the reply box. Thanks for letting me know, I'll have to find 3rd-party host I guess, Free Image Hosting is what I'll try, sorry bout that guys-- thanks, R.
Hour later-- still working on it, Free Image Host gave me either visible links or blue boxes w/ a question mark in it but no photo, I'll try another site
0 -
Is there a photo in my prior post? Fingers crossed....
0 -
I post a number of pictures here by simply copying to the clipboard on my PC and then once I click in the "Add reply" box hitting the CTRL + V keys, pasting it. I've seen that some of those have disappeared. If you select the "Add Attachment" below this dialog here you can browse your PC for an image like a jpg, select and add it here. Doing it the latter way I mention I've never had the Image not found happen.
0 -
ryxlyx posted:
Dang. The pictures all show when I pull it up, I just used the prompts on the reply box. Thanks for letting me know, I'll have to find 3rd-party host I guess, Free Image Hosting is what I'll try, sorry bout that guys-- thanks, R.
Hour later-- still working on it, Free Image Host gave me either visible links or blue boxes w/ a question mark in it but no photo, I'll try another site
Yes! that worked.
1 -
We're in biz then, gimme a few minutes, hypoglycemic, about to pass out haha--thx!
0 -
ryxlyx posted:
We're in biz then, gimme a few minutes, hypoglycemic, about to pass out haha--thx!
Damn... Go get some sugar! I'm Hyperg and sometimes I go low (Hypog). I hate that! Makes me start shakin and my brain goes south!
0 -
Tim O posted:ryxlyx posted:
Dang. The pictures all show when I pull it up, I just used the prompts on the reply box. Thanks for letting me know, I'll have to find 3rd-party host I guess, Free Image Hosting is what I'll try, sorry bout that guys-- thanks, R.
Hour later-- still working on it, Free Image Host gave me either visible links or blue boxes w/ a question mark in it but no photo, I'll try another site
Yes! that worked.
Thanks for taking the time to post all that. I'll definitely be able to put some of your technique to use. Remember seeing that 525 blade a while back and dang it's a beauty.
0 -
ryxlyx posted:
Thanks for the great post & photos!
1
Please sign in to leave a comment.
Comments
61 comments