201 Activator Plus Scale WIP

Here it is, got it wrapped up today.
I LOVE the 201+ design from Snody, it's perhaps the perfect fixed blade for me, great balance, nice steel, great ergo's, its the total package. I did want to make it a bit more tactical in nature by adding composite handles and a kydex sheath... so I did.
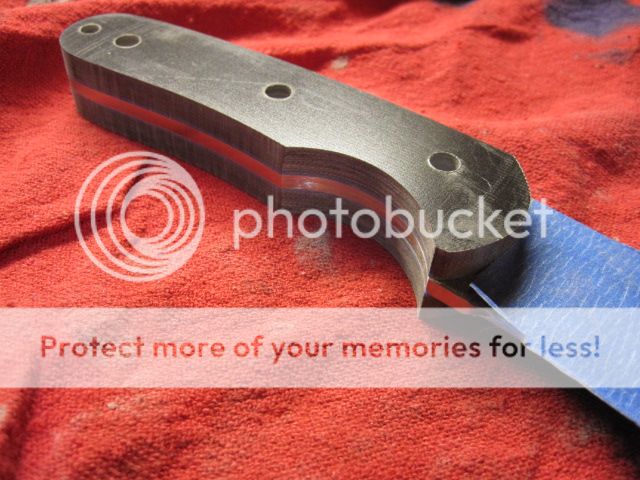
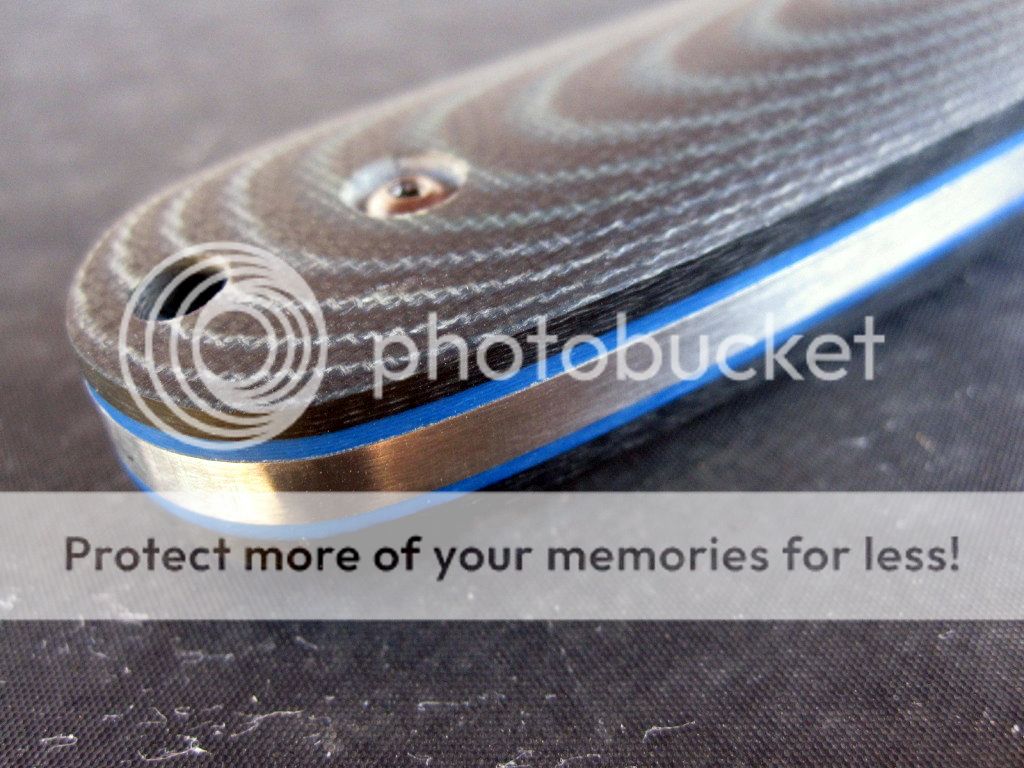
I decided to go with black canvas micarta and blue liners.
I started by epoxying the blue G10 liners to the micarta. Then I cut them into blocks to begin making the scales...

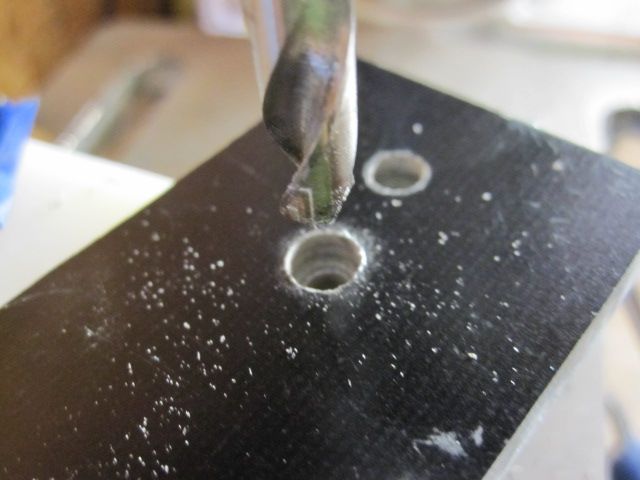
Next I start punching holes in the scales. I use one hole (here I used the lanyard hole) as an index for the rest. How I do it is, first I drill the lanyard hole, then use the same bit to act as an indexing pin as I drill out the hole furthest from the lanyard hole. Once I have those two holes drilled and filled with the right size pins (drill bits) I drill the rest of the holes and it gives me a perfect fit everytime.
First hole...
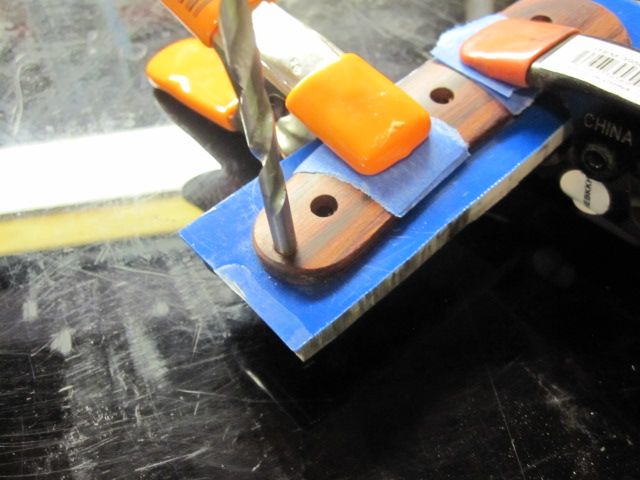
Second hole...
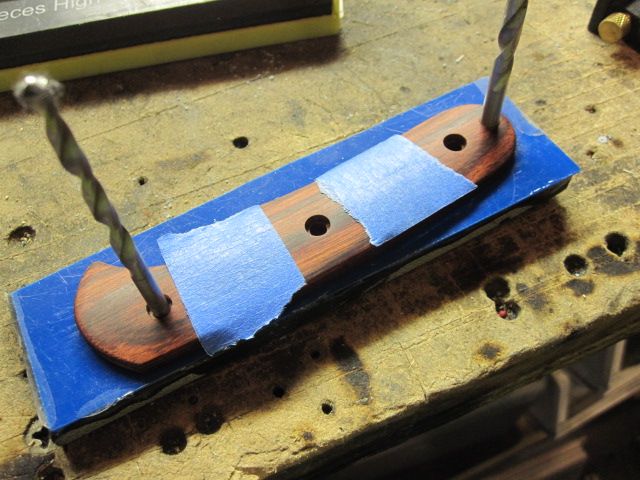
Now I can knock out the rest and they will be perfectly lined up for a tight fit...
Once I know my holes are correct then I can go ahead and use the same indexing with the drill bits and scribe a line into the G10 marking out the exact profile of the original scales. I use a carbide scribe for this and it works great.

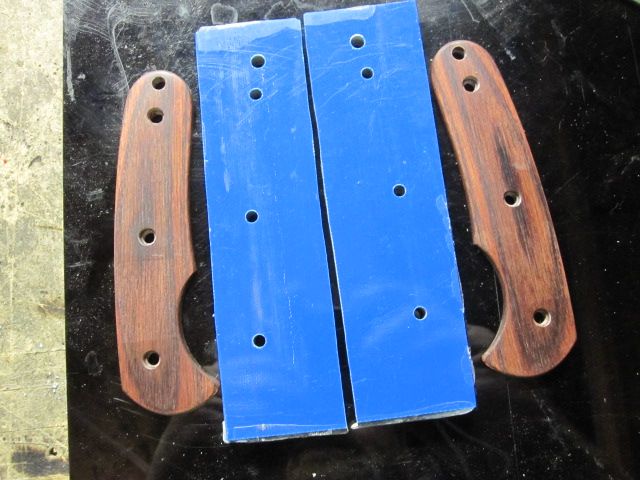
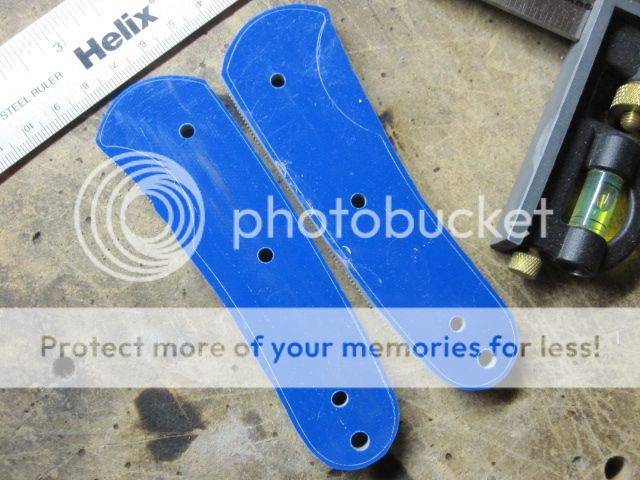
Now I flip the scales over and counter bore the screw holes so the heads of the screw sit below the surface of the scale. I set the depth on my drill press so I don't go too deep ruining the good fit I just worked so hard for...
I LOVE the 201+ design from Snody, it's perhaps the perfect fixed blade for me, great balance, nice steel, great ergo's, its the total package. I did want to make it a bit more tactical in nature by adding composite handles and a kydex sheath... so I did.
I decided to go with black canvas micarta and blue liners.
I started by epoxying the blue G10 liners to the micarta. Then I cut them into blocks to begin making the scales...
Next I start punching holes in the scales. I use one hole (here I used the lanyard hole) as an index for the rest. How I do it is, first I drill the lanyard hole, then use the same bit to act as an indexing pin as I drill out the hole furthest from the lanyard hole. Once I have those two holes drilled and filled with the right size pins (drill bits) I drill the rest of the holes and it gives me a perfect fit everytime.
First hole...
Second hole...
Now I can knock out the rest and they will be perfectly lined up for a tight fit...
Once I know my holes are correct then I can go ahead and use the same indexing with the drill bits and scribe a line into the G10 marking out the exact profile of the original scales. I use a carbide scribe for this and it works great.
Now I flip the scales over and counter bore the screw holes so the heads of the screw sit below the surface of the scale. I set the depth on my drill press so I don't go too deep ruining the good fit I just worked so hard for...
0
-
From there all you need to do is remove material until you are happy with the fit.
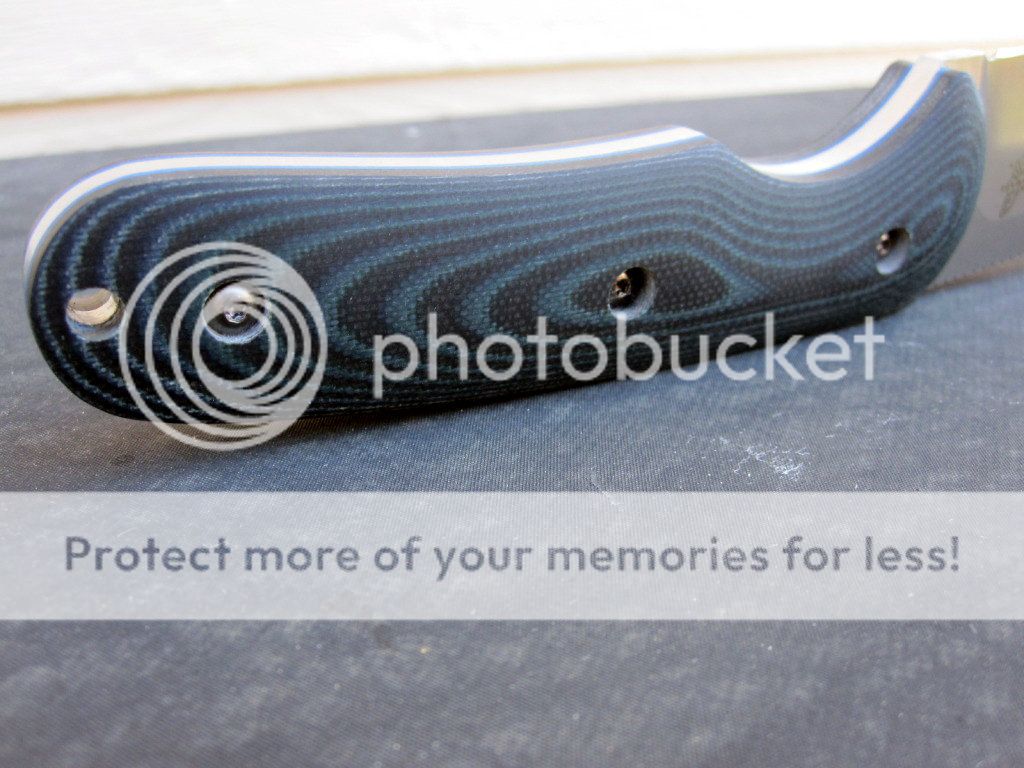
I start by profiling the scale, or trimming it to its final outline. I use a combo sander and dremel for this step.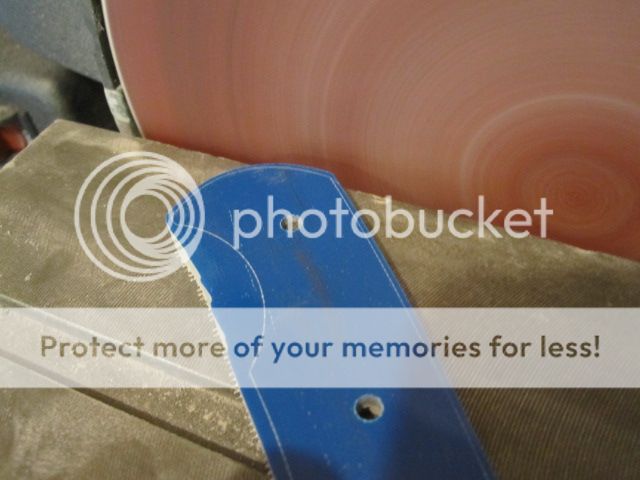
I just try to get it close without touching the steel of the knife, then I back off and start using finer grit belts and a lot more patience to just have the belt kiss the steel for a flush fit...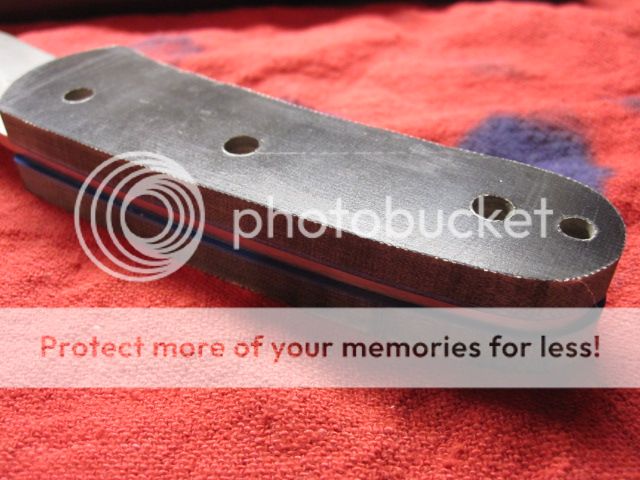
Flush sanding the scales...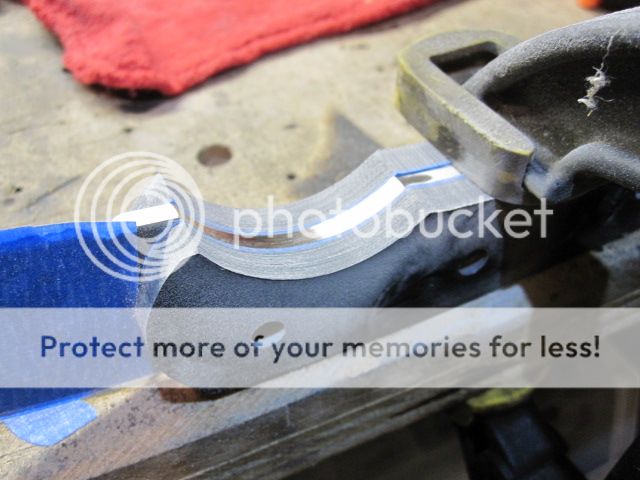
Once I am happy with the profile fit it is time to start shaping the rest of the knife's contours.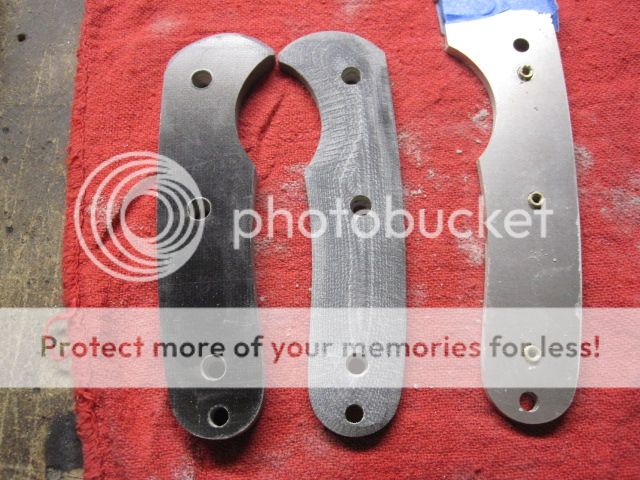 0
0 -
Once you have something that feels good in the hand, I shut down all the machines and start working the scale with sandpaper by hand with a stiff rubber backing pad. This allows me to get smooth transitions and by going slow, I can see all the scratches that need to get sanded out for a smooth finish. 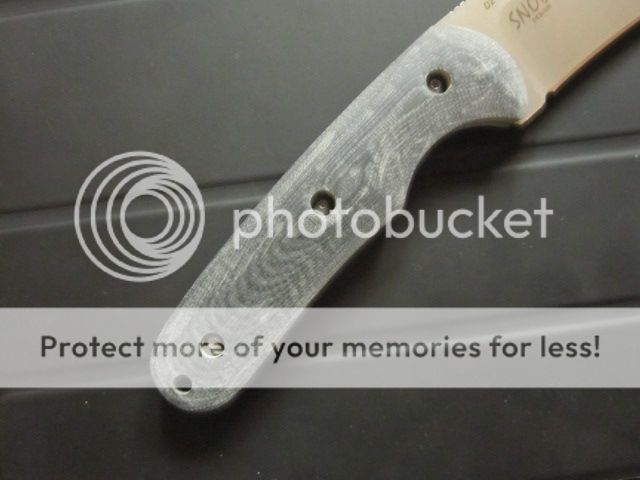
After I am happy with the rough version, I work from 80 to 120 to 220 grit... I ended these around 320 grit for a balance between glossy and rough. I think it came out nice...
 1
1 -
Lastly, I whipped up a kydex sheath for this knife, kydex is easy to work with and makes for a great sheath that is uneffected by the elements. I added a small tek-lok for belt carry but an IWB strap would be just as easy to add. 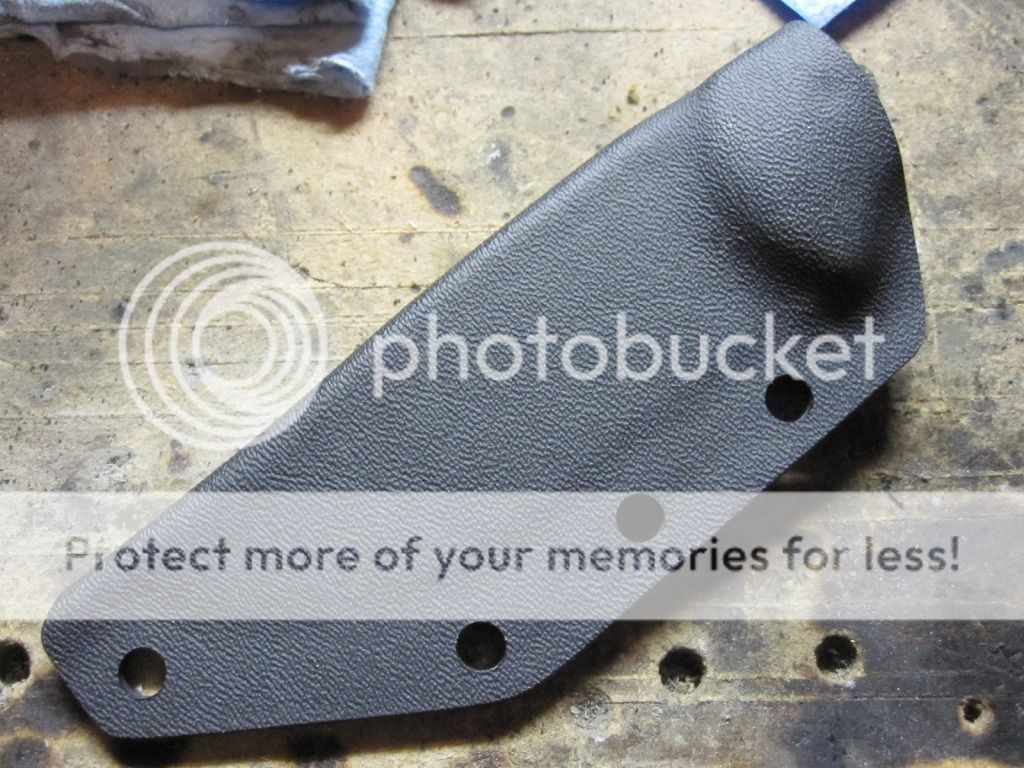
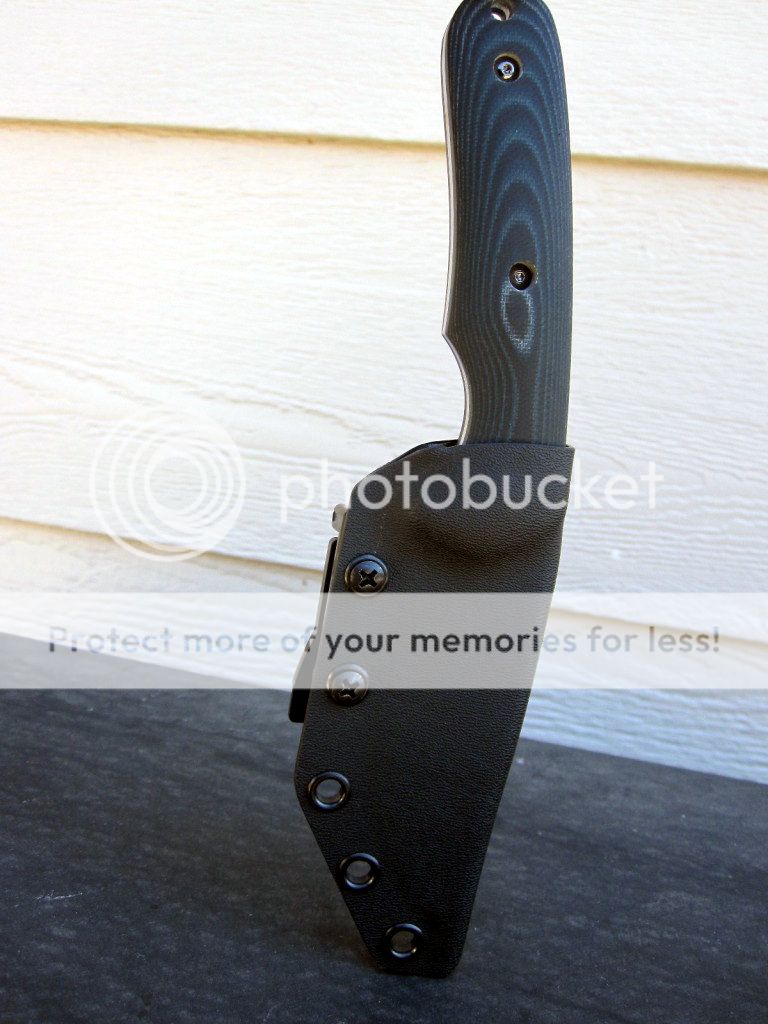
What do you think, I really love how this one turned out, it's an amazing knife that really has its place with anyone who enjoys the woods.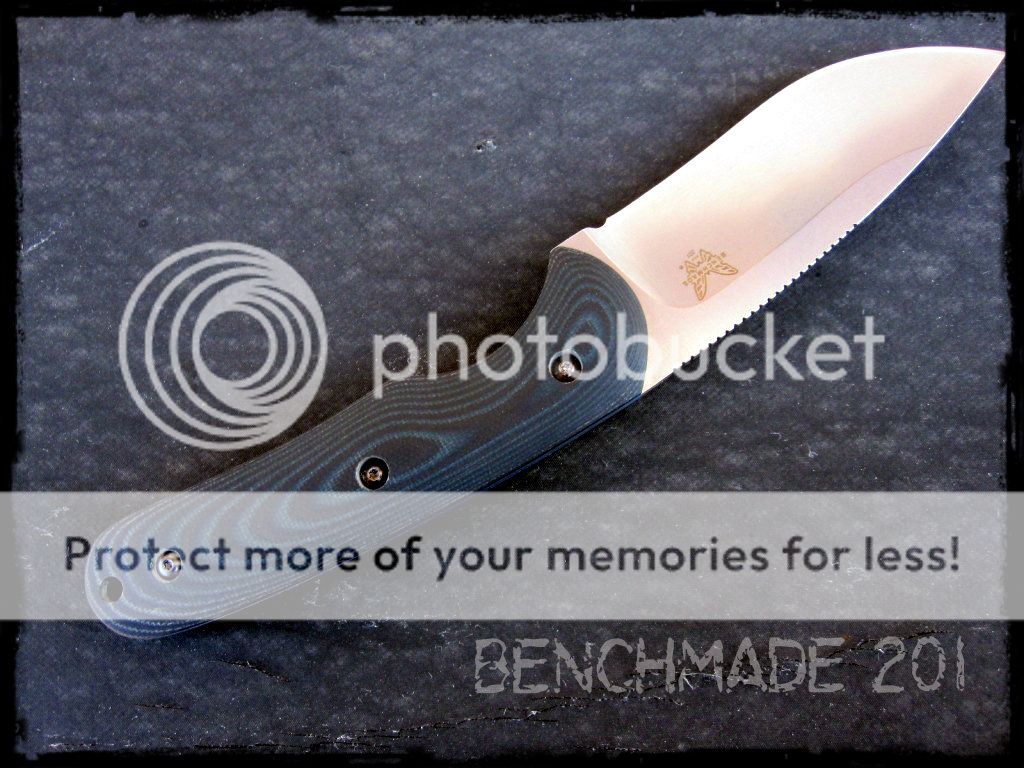 1
1 -

Looks good,well done!!! 1 -

Very nice! 
I like the way you contoured it, it shows the layers very nicely.1 -

Beautiful! 0 -

Great work and post. Thanks for sharing.  0
0 -

Thanks for sharing the process. The end result's stellar; I'd buy that...  0
0 -

Good work as always. Nice seeing you around!  0
0 -
Thanks for the kind words fellas.
Drew0 -

WOW that looks great. Excellent job man. 0 -

would you be able to custom my activator like yours? 0 -
 quote:Originally posted by APBT:
WOW that looks great. Excellent job man.
ditto0 -

That looks like pro grade work, Drew. Congratulations! 0 -

Heck yes..I like it 0 -

very nicely done ! congrats ! 0 -
 quote:Originally posted by TheBlueram234:quote:Originally posted by APBT:
WOW that looks great. Excellent job man.
ditto
Ditto the ditto.
Looks fantastic to me 0
0 -

Looks Great! Very nicely done. 0
Please sign in to leave a comment.
Comments
18 comments